Friday, June 17, 2011

please do not eat the cupcake!

A friend of mine just flew back home to have a break and as she would be away during her birthday I thought I'd better get a present organised before she left!


As we're both getting into the baking scene, I made her a cupcake card. This card was actually inspired by another card I made at a Stampin' Up demonstration where it was a flowerpot full of flowers.

First I made the pot by tracing it on cardboard, glued that together and used it as a template to trace the cupcake (remembering to add a little tab at the top to support the cherry button). The first cupcake didn't seem to fit right, so I cut it down and it looked worse so I remade the cupcake part! I think the problem, was that the cupcake case wasn't even on both sides and I must have slipped it in the wrong way! I ended up covering both sides of the case so I put my 'handmade by...' stamp on the back of the cupcake and squeezed in a message on the front XD


This was a pretty fun card to make so I think I'll make it again, even though I normally like to make new styles but there can be a lot of versatility with the patterns chosen!

Items:
  • Scrapbooking paper
  • Button - I bought this in a button pack from Aldi's though I've seen similar ones in Lincraft
  • Stamps - Flower stamp (no brand)
And here's some more cupcake goodness ^_^

wrapping paper from Hot Dollar
gift bag from Big W (around $2)
 I also received some books I ordered recently which is exciting ^^

Origami Jewelry
Ayako Brodek


I've wanted to get this book for a while, just because the idea of origami jewellry sounds fun XD. I have attempted paper cranes in the past with nice washi paper but didn't get to the conversion into an earring part!! The front of the book talks about how to keep the piece together, using a varnish/coat on top and also basic origami folds to get you started. Some designs inside don't look like something I'd wear like the crab and sunburst brooch but many of them are very cute and colour-coordinated pieces which I'd like to try out. A lot of them are made into a brooch and earrings. And another thing to remember is that it is usually hard to imitate books exactly without the original paper used by the author, but with so many pretty designs on the market, it's really up to you to creae your own unique twist!

Korean Cuisine

Young Sook Choi


I wanted to buy a Korean cookbook and this was the one which I decided on after going through many of the Amazon reviews, although I'm planning to get another one at a later date. After purchasing it I realised it's a few years old, printed in 2001 and you can sort of tell by the layout. I haven't made anything from it yet but there seems to be a good amount of recipes. The beginning goes through basic ingredients and sauces used in Korean cooking, my sister was browsing through it and seems like one of the sauce ingredients was a few spoons of Coca Cola, I'll have to check up on that XD. There is also a nice (yummy-looking) section on Korean BBQ! The book is actually in both English and Traditional Chinese which is pretty cool, though not sure why the Chinese is there...

~~~


I also went to see the trains for the Sydney Steam Weekend on Queen's Birthday. I didn't ride the steam train which is a shame but it was impressive to see the display train belting out steam and then chugging away back to its home in Thirlmere.

The steam train on display is maintained by the Powerhouse Museum and there were chances to visit the different carriages as well as try your hand at shovelling coal.The steam train ride is around an hour and is a round trip from Central to Clyde. I was around when the last trip of the day left and the tickets were probably sold out by half an hour beforehand from my guess.

Tuesday, June 14, 2011

drums and shakers

Last week at the Powerhouse Museum, there was a African Drumming session for the kids as well as a farewell party for Zoe's House, which is closing due to the museum's incoming Love Lace exhibition as well as the current revitalisation. But looking ahead, they will have the Wiggles exhibition to look forward to at the end of September.

The session itself involved two performers that the kids could drum along with, as there were drums placed in front of each seat as well as an activity to create their own shakers to take home. With the echoes of the drums still reverberating throughout the museum, everyone headed over to the table for some cake and drinks and then over to Zoe's House to say goodbye.


Here's the shaker I made with mung beans and rice! :)


I also went to see the ice polar bear at Circular Quay I heard about on the radio.


You can donate to the cause regarding the plight of polar bears and global warming on the website.

Saturday, June 11, 2011

butterfly dancing

Craft

Made a few changes to the flower card I made a few days ago as I thought it was missing something! I realise I did actually make it incorrectly according to the instructions, you're supposed to cut strips from the card (that are next to each other) at different lengths so that the "flower garden" looks a lot fuller.

I added two butterfly stickers, these are made for cardmaking so have a clear backing and they're really nice!!


I added a tinkerbell sticker to the bottom, it's hard to spot!


Also found a cute quote online to add as a P.S.


Some cooking adventures!
Made some M&Ms cookies for the birthday girl. I substituted half the M&Ms with choc chips because (1) I wanted to eat the M&Ms and (2) thought I might as well finish the pack of choc chips! Tip: If you're using crispy M&Ms, the chocolates will stick to your teeth if you eat the cookies hot!

I also made some Coca Cola flavoured jelly, as Aeroplane Jelly have a new product where instead of just cold water, you use 200ml of a soft drink or fruit juice, and I had a spare mini Coke can which was just the right size! :)


Nom nom spotting for the day ^^

Cargo bar/lounge.


Azuma Pâtisserie.

 strawberry layer; chocolate mousse
 green tea latte
white hot chocolate

Ton Ton.

Wednesday, June 8, 2011

flower garden card and some new craft items

Cool way to view the blog ^^ http://garmidesign.blogspot.com/view/sidebar

It's been a very long time but I finally made some cards, I made a cupcake card which I'll post about next week ^^ and I also made a flower card! The idea came from one of the new books I bought called Paper Pop Up (Dorothy Wood). This is one of the cards where the inside is the main attraction.

I really love that stamp in the top left corner!! I'm going to write the message around the edge, usually don't make cards where the inside is so elaborate!!

I have to say, I'm a bit sick of cutting out flowers at the moment, I cut out around 6 and only used 3 because the original flowers were too big and then I chose some that were too small >.<

(outside)

The card took a lot of cutting and glueing, so not sure when I'll re-attempt it, I'll see what ideas I can think of using the pop-up strips like that.

Items used:
  • Paper: Fiskars 'heidi grace designs' Garden Flowers Decor
  • Stamps: Black flourish from grace taylor 1242 fancy corner; daisy with sentiments from kaiserscrapbook CS701 Flowers; small flowers from packs from Paper Xtra and SandyLion
  • Ink: Versa Color 24 Opera Pink; Bazzinks black; Dew Drop Brilliance Pearlescent sky blue & orchid & thyme
  • Also some rhinestones and foam stickers

Craft shopping ;)

The week's just started and I've already gone shopping *sigh* but the good thing is I finished buying some birthday gifts for some upcoming events :) but onto the craftiness and cookingness!

Some more paper tape "washi tape", they still had the same designs I bought previously.


Ribbon lace - on sale from Riot!


Scrapbook paper (29c each at Riot!, and some of these were double-sided too!) The two on the right have non-straight edges.


From Big W, I bought this set of plain coloured cards, they were $5 down from $15 for a damaged box and I checked that all the cards were still there =D although some of the envelopes had little creases!


Some green string, good for tying gifts and also Chinese knotting.

Cake decorator


Nori (seaweed puncher) - I've been looking for one of these!!! ^^ although I actually only noticed this because it was on the wrong hook


And here are some bikkies that my aunt brought from Disneyland for us!~

Thursday, June 2, 2011

The Museum of Me - a very cool social media link!


It has to access your facebook to create a mini museum of your social media life. The first page is like an entry with your name in big letters, next you see five friends you interact the most often with.

Next is a location page, I think it's when people tag you in places but it's hard to tell XD and also a nice image gallery of photos you have posted, from what I can tell, it seems to be from your profile pics and your latest album! Words that you use often in your status updates, mine was 'All' but I did it again and it changed till 'One' XD


Then there is also popular links, videos and photos that you have liked and then they make a nice mosaic afterwards (you need to see this for yourself!).


I also like the music choice which is from Takagi Masakatsu.

Not too many pictures since I don't want to spoil you reaction and it's best to visualise it yourself.


Wednesday, June 1, 2011

Hey Mario, I made some pizza

In the past week I've been making home-made pizza. The reason was because my Good Taste magazine (or maybe it was BBC Good Food) had a few delicous looking pizza recipes but in the end I ended up using the pizza dough recipes off Taste.com.au.


The first time I used the basic recipe for one base, I haven't used yeast before but seeing as it was around one cup of water, I used a mug to mix the yeast in. I left it for the ten minutes and when  came back it has foamed up nicely.


As I was still setting up a few things, it rose even more that it seemed like it was a souffle (a yeast souffle O_O!). I mixed it into the flour and kneaded for the ten minutes and let it rise, it did double in about half-an-hour but I didn't use it until around 3 hours later so it was even bigger and very airy.


I ended up making two pizzas though was hard put trying to stretch it to a 30cm diameter. I made a sea salt and roemary pizza as well as a cheesy potato pizza because I didn't have tomato paste for a pizza base and barely enough cheese.


The second time I made the other recipe but at first the yeast didn't bubble at all. Not sure what happened, whether the water was too hot or cold as the consistency only changed a tiny bit at the bottom of the bowl. I remade the yeast mixture after getting home and while watching the water I saw the yeast bubble up - which looked pretty amazing! The end result wasn't like in the mug but that may have been because of the surface area. This time I made it with plain wheat flour as a healthier option and made 4 pizza bases, one is still in the freezer!

I made a simple tomato base, ham, kransky and mozzarella pizza which was quite nice. Thanks to my sister for buying all the toppings! I then practised a cheesey crust with cheddar cheese, I didn't really make it carefully! Some pickled cucumbers were added to the top although they lost most of their tangy flavour. I then made an over-the-top pizza with way too much cheese, and all the other toppings, it also had some BBQ sauce, bocconcini and avocado. I was supposed to make the potato pizza again but left the potato in the oven for too long so ended up having them as potato chips -_-.


The yeast and the warm water

I don't really watch Master Chef that much (I really should!!!) but I did catch the Master Class episode where they taught us how to make crumpets (which is the initial reason I picked up a packet of yeast - haven't made them yet!). The 'warm' water for the yeast should be a comfortable temperature of 37 degrees celcius which is body temperature, so when you put your finger in you suposedly can't feel anything because it's the same temperature. (They don't mention this on the website so hopefully I remembered my facts correctly!)

Recipe on Master Chef: Green Eggs and Ham with Homemade Crumpets
Pizza Dough for 1 base
Pizza Dough for 3 bases

On another note, my friend TC lent me this cool book and I think I will be making some corn bread soon ^_^


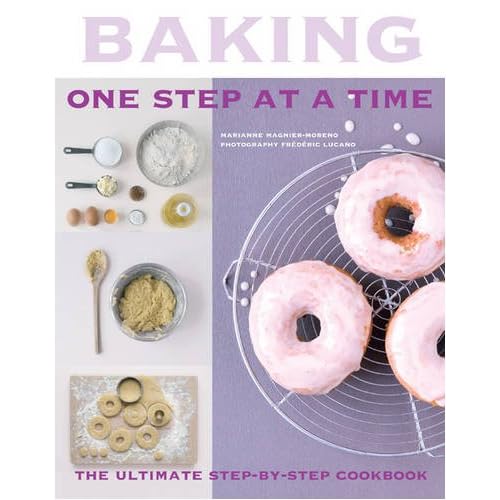
image from Amazon ;)